
How to install and set up VS Code for Python — the extensions I use at university
Configuring VS Code for Python correctly is the first thing you should do before writing a single line of code. When I decided to practice on my own and start building my own programs, it took me days to get it properly configured, nobody told me which extensions to install or how to set it up to work comfortably.
In this article I’ll tell you exactly what I use, no fluff.
Table of Contents
What is VS Code and why don’t we just use Python’s IDLE?
Python comes with its own editor called IDLE, but it’s basic and limited. VS Code is a free, professional editor used by everyone from students to developers at top companies. Using it greatly improves your efficiency and comfort when writing code. You’ll see it in every programming course during your degree, so learning it properly from the start is time well spent.
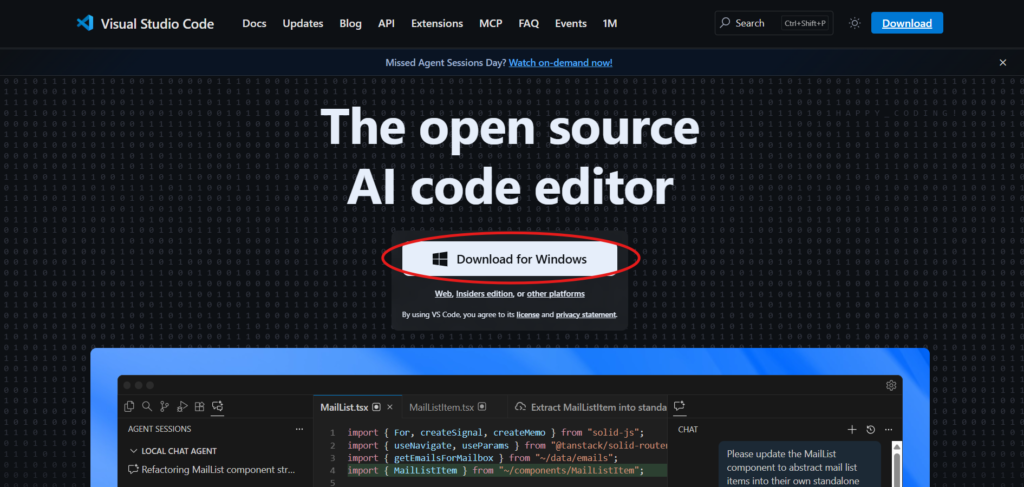
Step 1 — Download and install
Go to code.visualstudio.com and download the Windows version. The installation is next, next, next, no tricks here like with Python.
Step 2 — Essential extensions to configure VS Code for Python
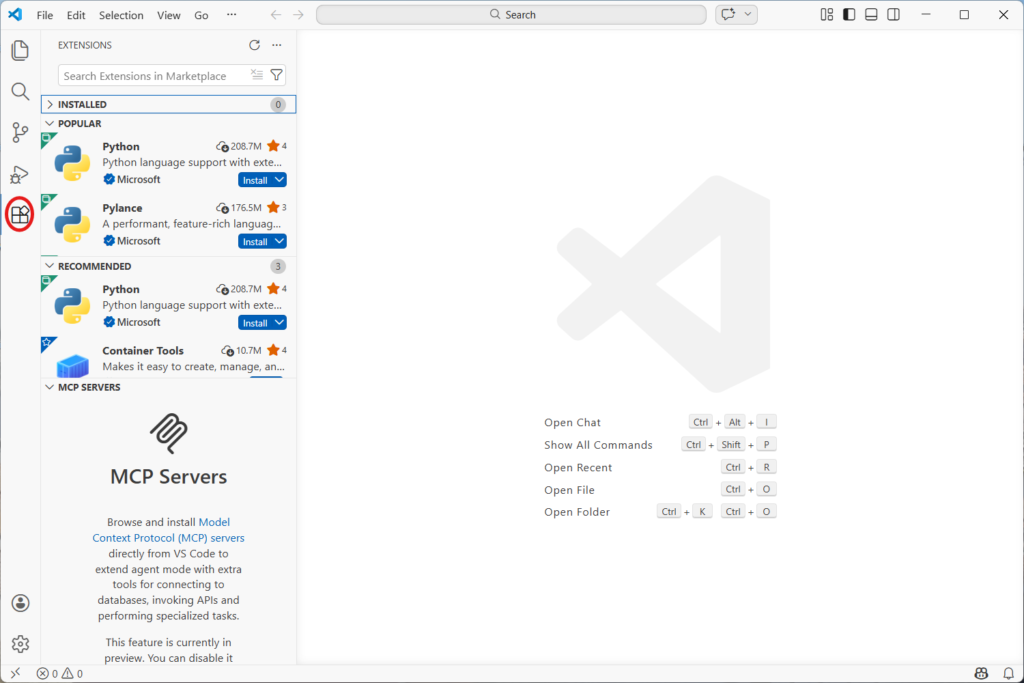
This is what really matters: the extensions. VS Code without them is like a car without wheels. Open it, go to the extensions icon in the left sidebar (the squares icon) and search for and install these:
- Python (by Microsoft) — essential. It tells VS Code you’re writing Python, activates autocomplete and real-time error detection. Without this extension there’s no point using VS Code for programming.
- Pylance (by Microsoft) — takes Python autocomplete to a level that feels like magic. When you type a function name it shows you the parameters, the documentation, everything.
- Jupyter (by Microsoft) — essential if you’re going to use .ipynb notebooks, which in statistics and data science you’ll use constantly. It lets you run code cell by cell inside VS Code without opening the browser.
- Rainbow CSV — if you work with CSV data files (which in a data degree you’ll see a lot), this extension colors each column a different color. Sounds trivial but makes data files much more readable.
- indent-rainbow — colors indentation levels in your code. In Python, indentation is mandatory and one mistake breaks the entire program. This extension saves you a lot of headaches.
Step 3 — Key settings to configure VS Code for Python
Open settings with "Ctrl" + "," and change these:
- Auto Save — search for “Auto Save” and set it to
afterDelay. This way VS Code saves automatically every few seconds and you’ll never lose code by forgetting to save. - Font Size — search for “Font Size” and set it to 14 or 16. The default is small and after hours of programming your eyes will thank you.
- Format On Save — search for “Format On Save” and enable it. Every time you save, VS Code automatically tidies your code. It stays clean and properly indented without you doing anything.
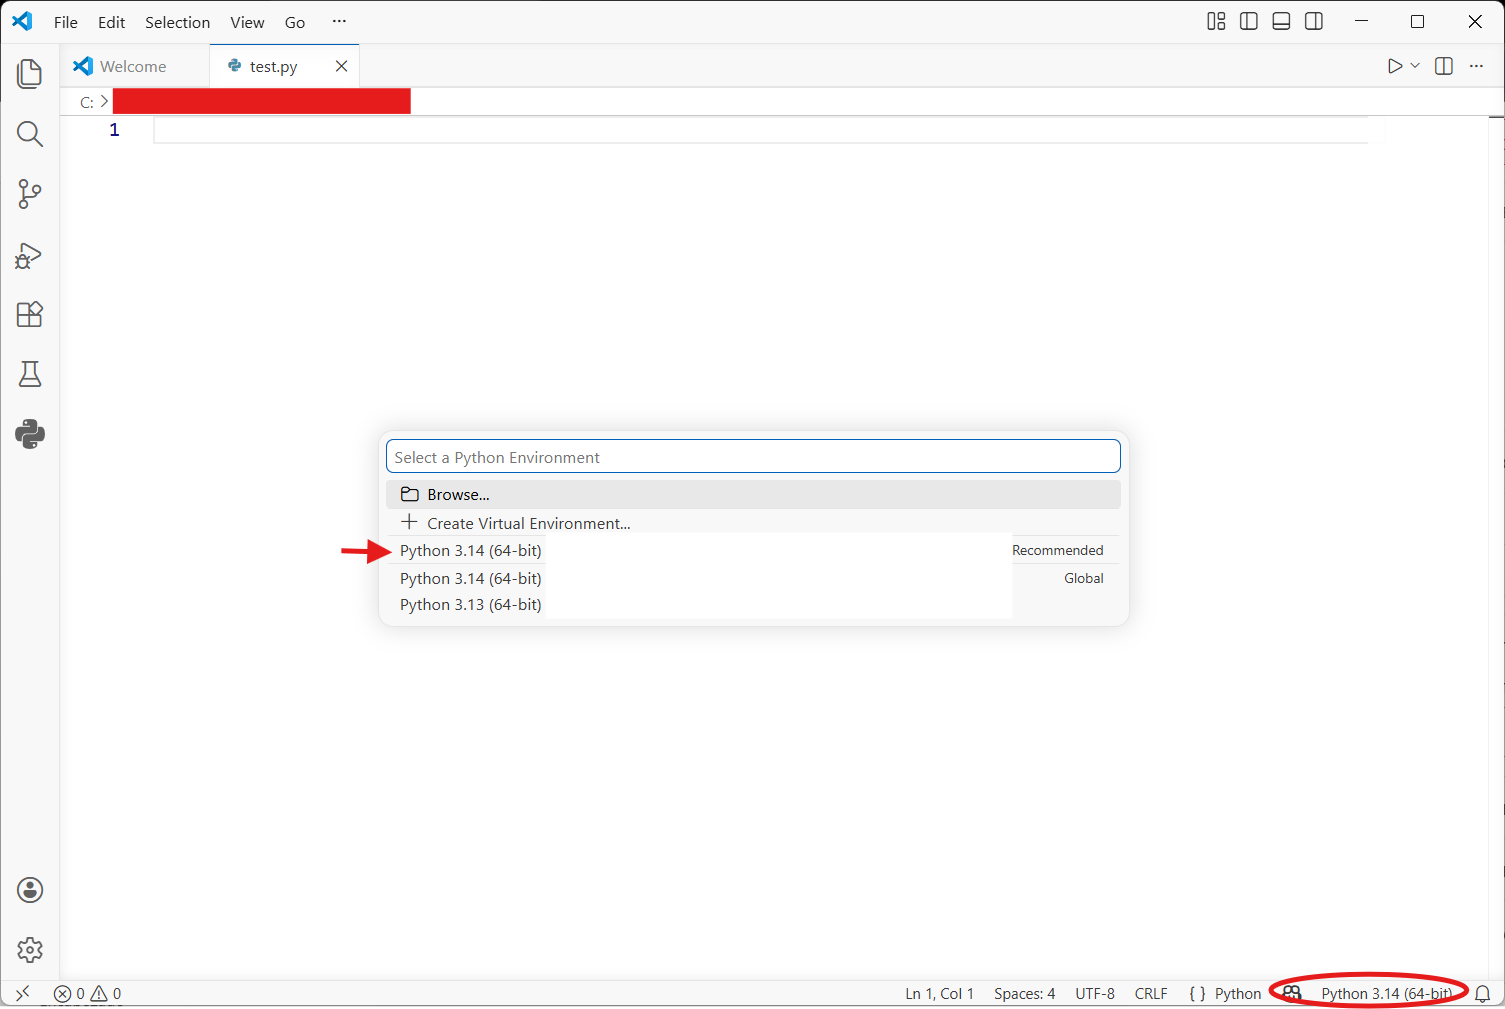
Step 4 — Connect it to Python
Open VS Code, create a new file and save it as test.py. In the bottom right corner you’ll see the selected Python interpreter. Click it and select the Python version you installed. If it doesn’t appear, close VS Code and reopen it.
Now write this:
name = "Sergio"
print(f"Hello, {name}. Welcome to VS Code.")
Hit the play button in the top right. You should see the result in the terminal below. If it works, you’re all set.
What’s next?
With Python installed and VS Code configured you have the environment ready for your entire degree. In the next article we get into the interesting stuff: variables, data types, and why Python thinks differently from other languages.


2 Comments