Cómo instalar y configurar VS Code para Python — las extensiones que uso en la carrera
Configurar VS Code para Python correctamente es lo primero que deberías hacer antes de escribir una sola línea de código. Cuando me animé a practicar por cuenta propia haciendo mis programas, tardé días en tenerlo bien configurado porque nadie me dijo qué extensiones instalar ni cómo ajustarlo para trabajar cómodo.
En este artículo te cuento exactamente lo que uso yo, sin relleno.
Table of Contents
¿Qué es VS Code y por qué no usamos el IDLE de Python?
Python viene con su propio editor llamado IDLE, pero es básico y limitado. VS Code es un editor profesional, gratuito, que usan desde estudiantes hasta desarrolladores en empresas. Su implementación, permite mejorar enormemente tu eficiencia y comodidad a la hora de escribir código. En la carrera lo verás en todas las asignaturas de programación, así que aprender a usarlo bien desde el principio es tiempo bien invertido.
Paso 1 — Descargar e instalar
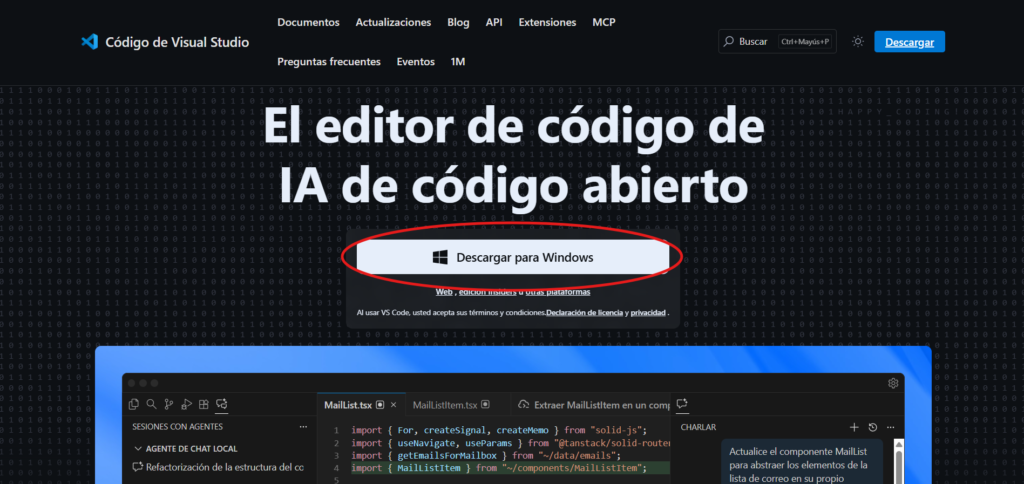
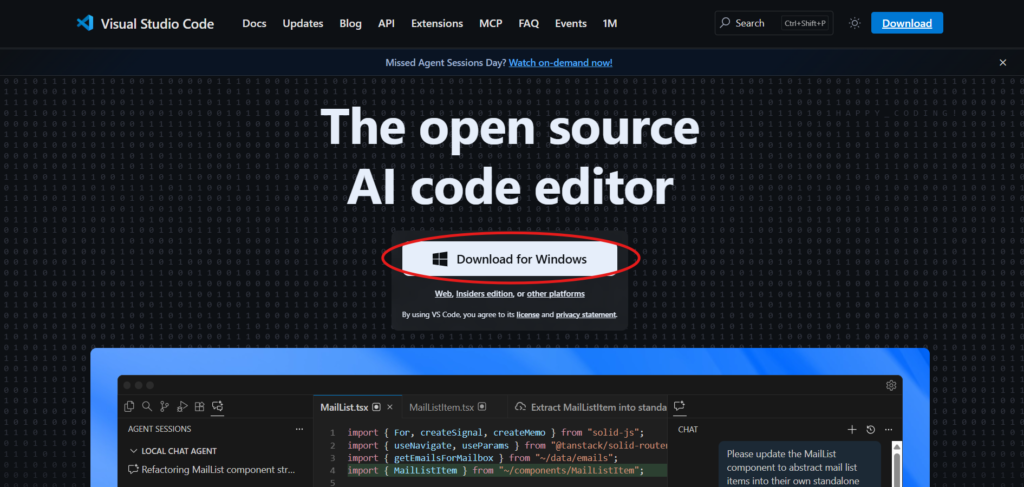
Ve a code.visualstudio.com y descarga la versión para Windows. La instalación es siguiente, siguiente, siguiente, aquí no hay trampas como con Python.
Paso 2 — Las extensiones esenciales para configurar VS Code con Python
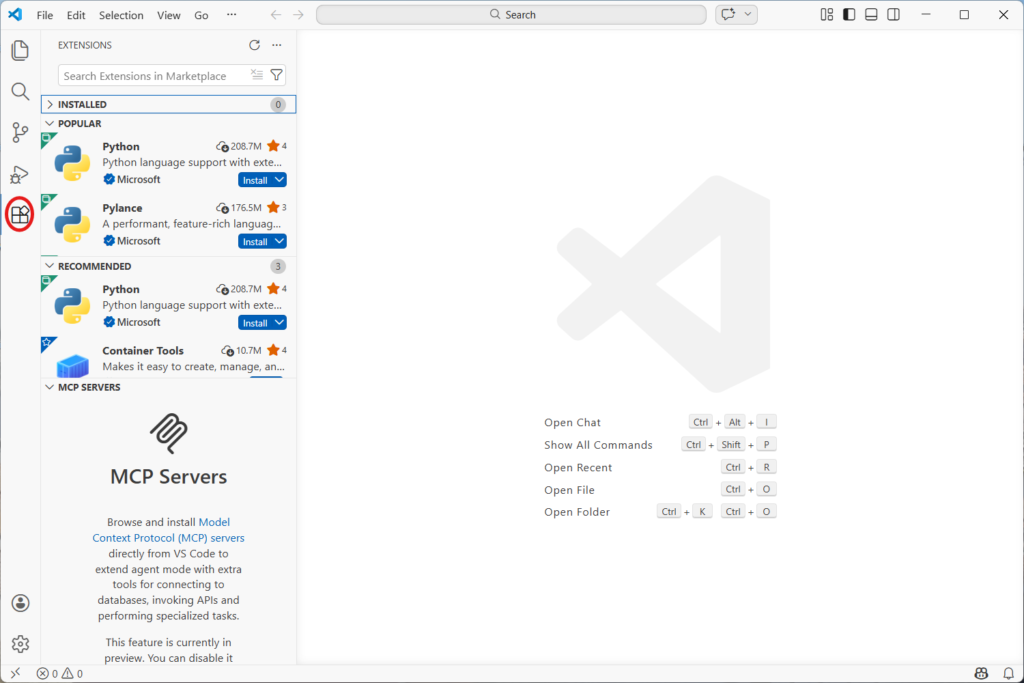
Esto es lo verdaderamente importante: las extensiones, VS Code sin ella es como un coche sin ruedas. Ábrelo, ve al icono de extensiones en la barra lateral izquierda (el de los cuadraditos) y busca e instala estas:
- Python (de Microsoft) — imprescindible. Le dice a VS Code que entiendes Python, activa el autocompletado y la detección de errores en tiempo real. Sin esta extensión no tiene sentido usar VS Code para programar.
- Pylance (de Microsoft) — mejora el autocompletado de Python hasta un nivel que parece magia. Cuando escribes el nombre de una función te muestra los parámetros, la documentación, todo.
- Jupyter (de Microsoft) — fundamental si vas a usar notebooks .ipynb, que en estadística y ciencia de datos usarás constantemente. Te permite ejecutar código celda por celda dentro de VS Code sin abrir el navegador.
- Rainbow CSV — si trabajas con archivos de datos en formato CSV (que en GCID verás mucho), esta extensión colorea cada columna de un color distinto. Parece una tontería pero hace los datos muchísimo más legibles.
- indent-rainbow — colorea los niveles de indentación del código. En Python la indentación es obligatoria y un error ahí rompe todo el programa. Esta extensión te salva de muchos dolores de cabeza.
Paso 3 — Ajustes clave para configurar VS Code para Python
Abre la configuración con "Ctrl" + "," y cambia esto:
- Autoguardado — busca «Auto Save» y ponlo en
afterDelay. De esta forma, VS Code guarda solo cada pocos segundos y nunca perderás código por olvidarte de guardar. - Tamaño de fuente — busca «Font Size» y ponlo en 14 o 16. El valor por defecto es pequeño y al cabo de horas programando los ojos te lo agradecen.
- Formato al guardar — busca «Format On Save» y actívalo. Con esto, cada vez que guardes, VS Code ordena tu código automáticamente. Tu código siempre estará limpio y bien indentado sin hacer nada.
Paso 4 — Conectarlo con Python
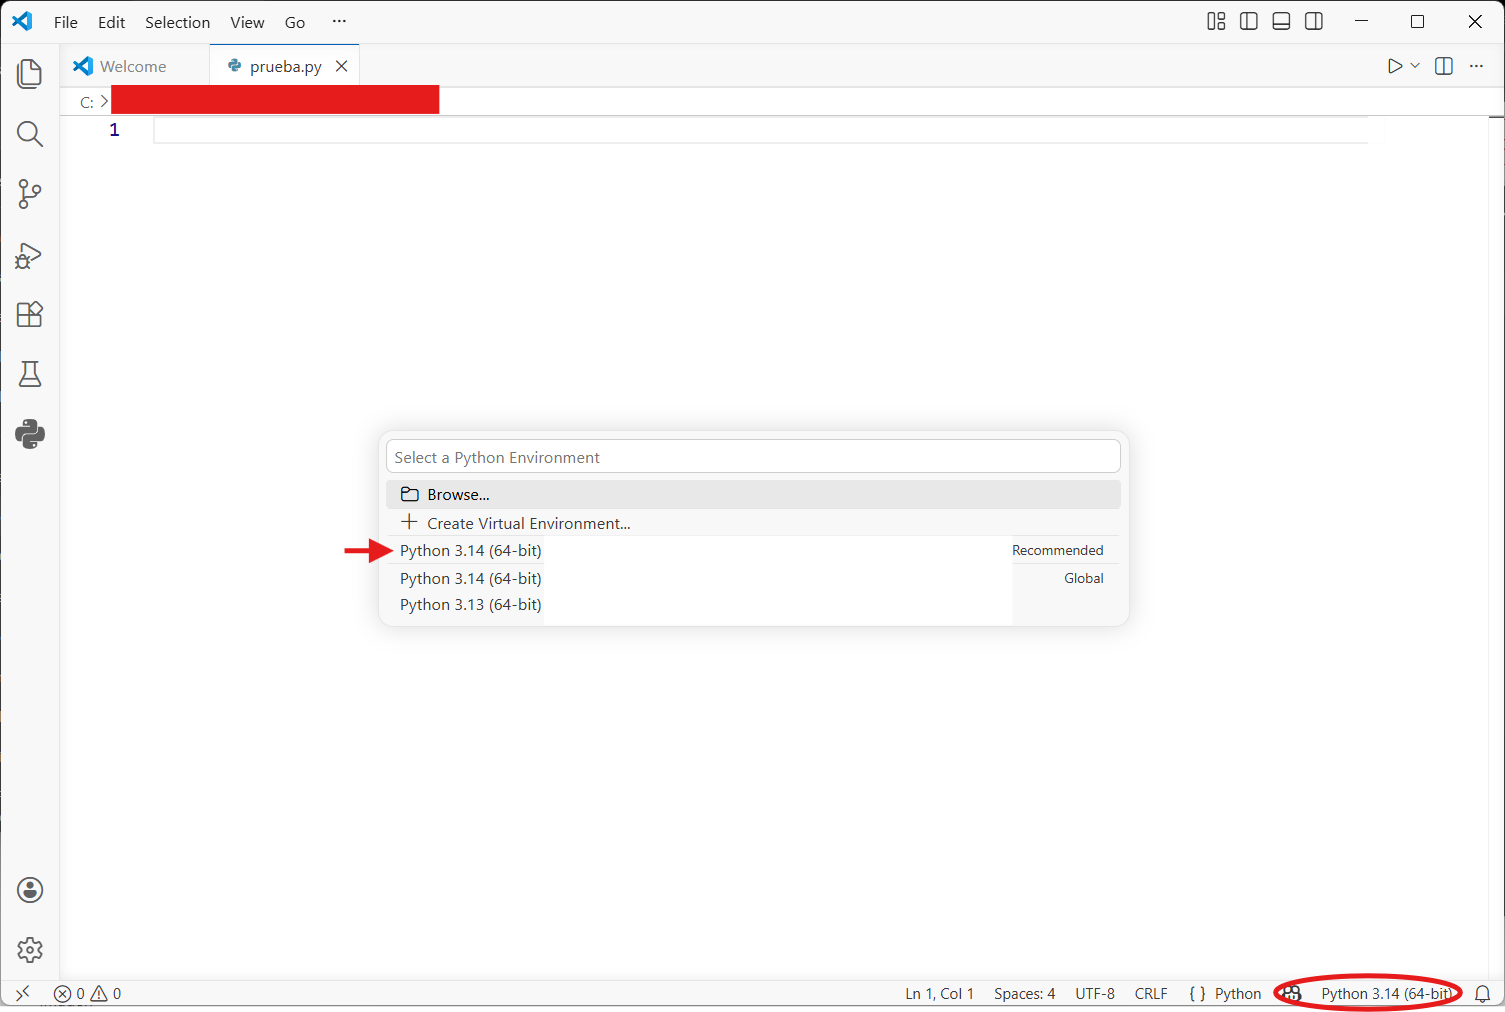
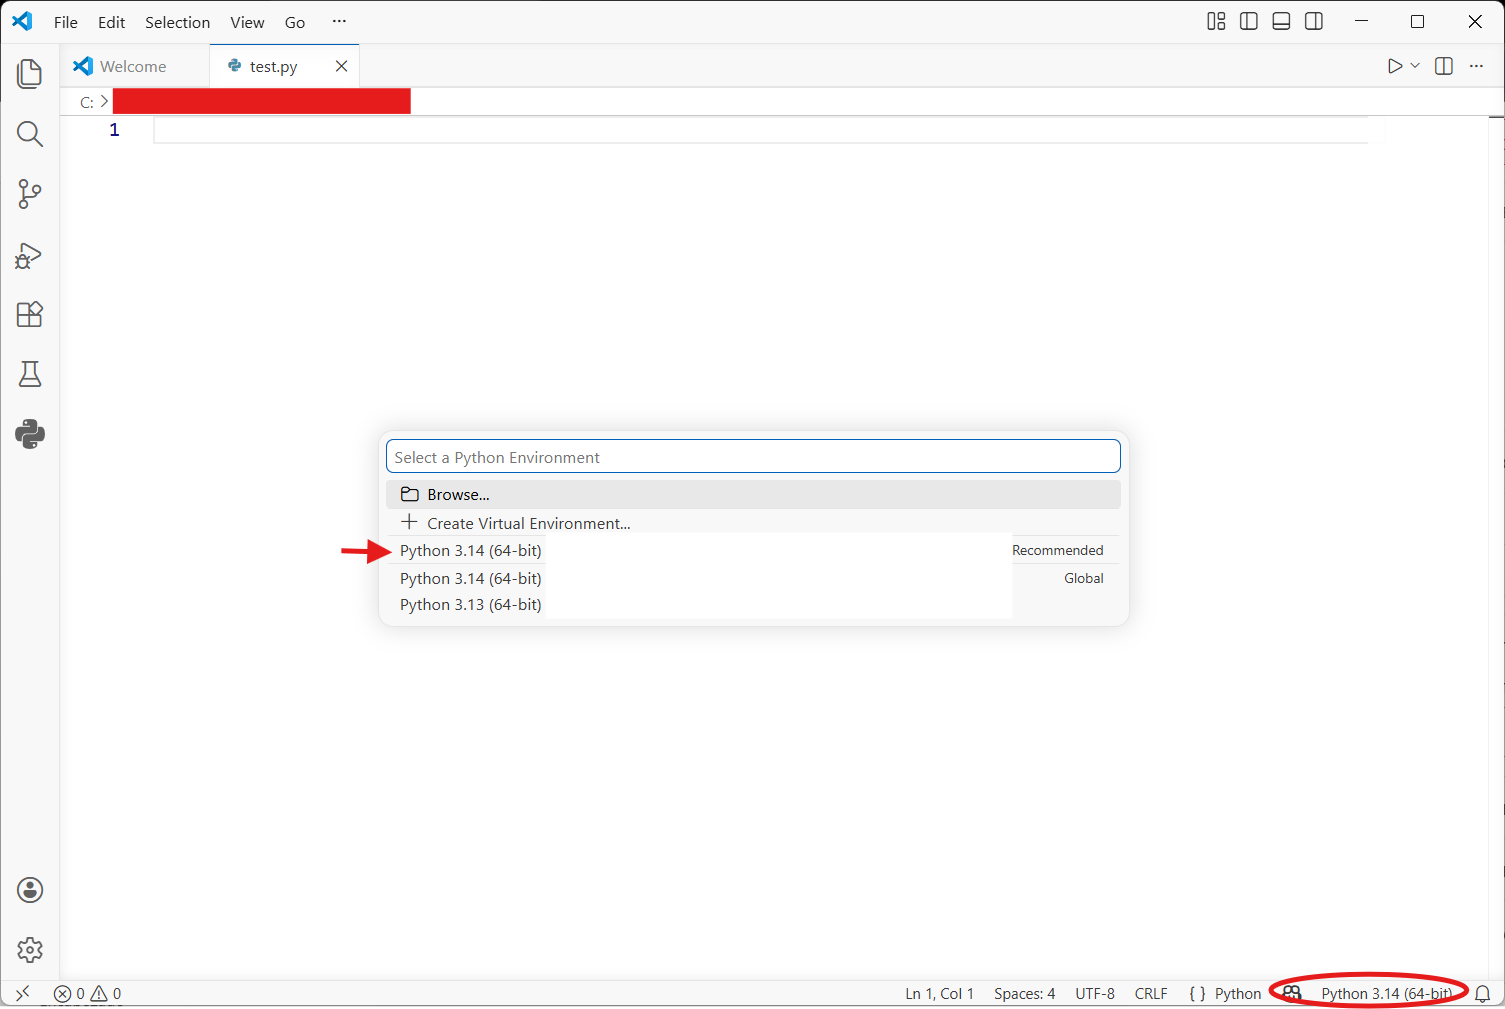
Abre VS Code, crea un archivo nuevo y guárdalo como prueba.py. En la esquina inferior derecha verás que dice el intérprete de Python seleccionado. Haz clic ahí y selecciona la versión de Python que instalaste. Si no aparece, cierra VS Code y vuelve a abrirlo.
Ahora escribe esto:
nombre = "Sergio"
print(f"Hola, {nombre}. Bienvenido a VS Code.")
Dale al botón de play que aparece arriba a la derecha. Deberías ver el resultado en el terminal de abajo. Si funciona, tienes todo listo.
¿Y ahora qué?
Con Python instalado y VS Code configurado ya tienes el entorno listo para toda la carrera. En el próximo artículo empezamos con lo interesante: variables, tipos de datos y por qué Python es tan diferente a otros lenguajes.
How to install and set up VS Code for Python — the extensions I use at university
Configuring VS Code for Python correctly is the first thing you should do before writing a single line of code. When I decided to practice on my own and start building my own programs, it took me days to get it properly configured, nobody told me which extensions to install or how to set it up to work comfortably.
In this article I’ll tell you exactly what I use, no fluff.
What is VS Code and why don’t we just use Python’s IDLE?
Python comes with its own editor called IDLE, but it’s basic and limited. VS Code is a free, professional editor used by everyone from students to developers at top companies. Using it greatly improves your efficiency and comfort when writing code. You’ll see it in every programming course during your degree, so learning it properly from the start is time well spent.
Step 1 — Download and install
Go to code.visualstudio.com and download the Windows version. The installation is next, next, next, no tricks here like with Python.
Step 2 — Essential extensions to configure VS Code for Python
This is what really matters: the extensions. VS Code without them is like a car without wheels. Open it, go to the extensions icon in the left sidebar (the squares icon) and search for and install these:
- Python (by Microsoft) — essential. It tells VS Code you’re writing Python, activates autocomplete and real-time error detection. Without this extension there’s no point using VS Code for programming.
- Pylance (by Microsoft) — takes Python autocomplete to a level that feels like magic. When you type a function name it shows you the parameters, the documentation, everything.
- Jupyter (by Microsoft) — essential if you’re going to use .ipynb notebooks, which in statistics and data science you’ll use constantly. It lets you run code cell by cell inside VS Code without opening the browser.
- Rainbow CSV — if you work with CSV data files (which in a data degree you’ll see a lot), this extension colors each column a different color. Sounds trivial but makes data files much more readable.
- indent-rainbow — colors indentation levels in your code. In Python, indentation is mandatory and one mistake breaks the entire program. This extension saves you a lot of headaches.
Step 3 — Key settings to configure VS Code for Python
Open settings with "Ctrl" + "," and change these:
- Auto Save — search for «Auto Save» and set it to
afterDelay. This way VS Code saves automatically every few seconds and you’ll never lose code by forgetting to save. - Font Size — search for «Font Size» and set it to 14 or 16. The default is small and after hours of programming your eyes will thank you.
- Format On Save — search for «Format On Save» and enable it. Every time you save, VS Code automatically tidies your code. It stays clean and properly indented without you doing anything.
Step 4 — Connect it to Python
Open VS Code, create a new file and save it as test.py. In the bottom right corner you’ll see the selected Python interpreter. Click it and select the Python version you installed. If it doesn’t appear, close VS Code and reopen it.
Now write this:
name = "Sergio"
print(f"Hello, {name}. Welcome to VS Code.")
Hit the play button in the top right. You should see the result in the terminal below. If it works, you’re all set.
What’s next?
With Python installed and VS Code configured you have the environment ready for your entire degree. In the next article we get into the interesting stuff: variables, data types, and why Python thinks differently from other languages.


4 comentarios