How to install Java on Windows — JDK 21 and VS Code ready in 10 minutes
Installing Java on Windows is the first step before writing a single line of code in FP2. This guide takes you from a blank Windows machine to a working Java development environment in under 10 minutes — JDK 21 downloaded, installed, verified in the terminal, and VS Code configured with the Java extension pack.
Table of Contents
What you need to install Java on Windows
Java development requires two separate things that beginners often confuse:
JDK (Java Development Kit) — the complete toolkit for developing Java programs. It includes the compiler (javac) that converts your .java source files into bytecode, the JVM (Java Virtual Machine) that runs the bytecode, and all the standard libraries. Without the JDK you can’t compile Java code.
JRE (Java Runtime Environment) — only the runtime, not the compiler. The JRE lets you run Java programs but not create them. In older Java versions you had to download these separately. From JDK 9 onwards the JDK includes everything.
For FP2 you need the JDK — not just the JRE.
Why JDK 21
Java 21 is the current LTS (Long Term Support) version — it receives security updates and patches for years, unlike non-LTS versions that are only supported for 6 months. LTS versions are what universities, companies and serious projects use. JDK 21 is what ULPGC’s FP2 course uses.
Step 1 — Download JDK 21
Go to the official Oracle download page:
https://www.oracle.com/java/technologies/downloads/
On the page:
- Click the Java 21 tab
- Click the Windows tab
- Download the x64 Installer (the
.exefile — around 160 MB)
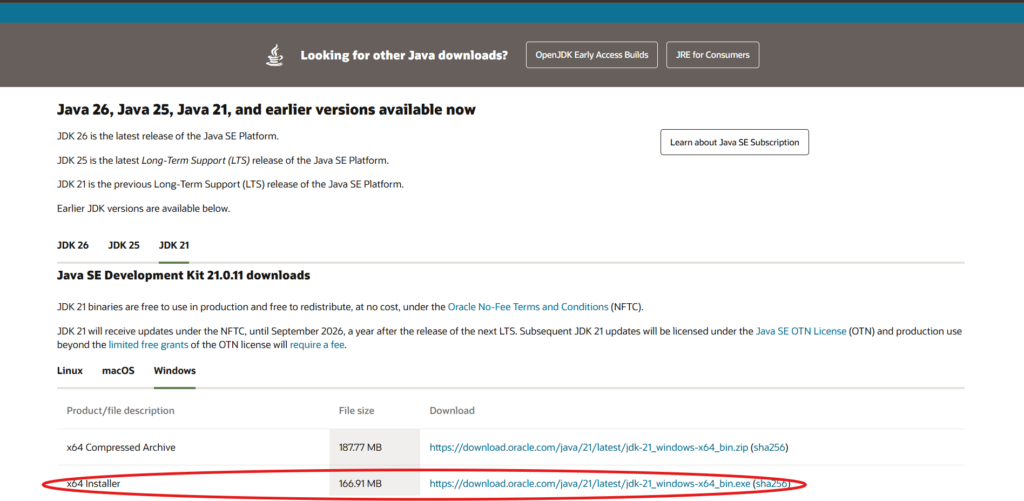
The filename will be something like jdk-21_windows-x64_bin.exe.
If you prefer an open-source alternative without Oracle’s licence restrictions, Adoptium Temurin 21 is identical for FP2 purposes:
https://adoptium.net/temurin/releases/?version=21
Select: Temurin 21 (LTS) → Windows → x64 → JDK → .msi
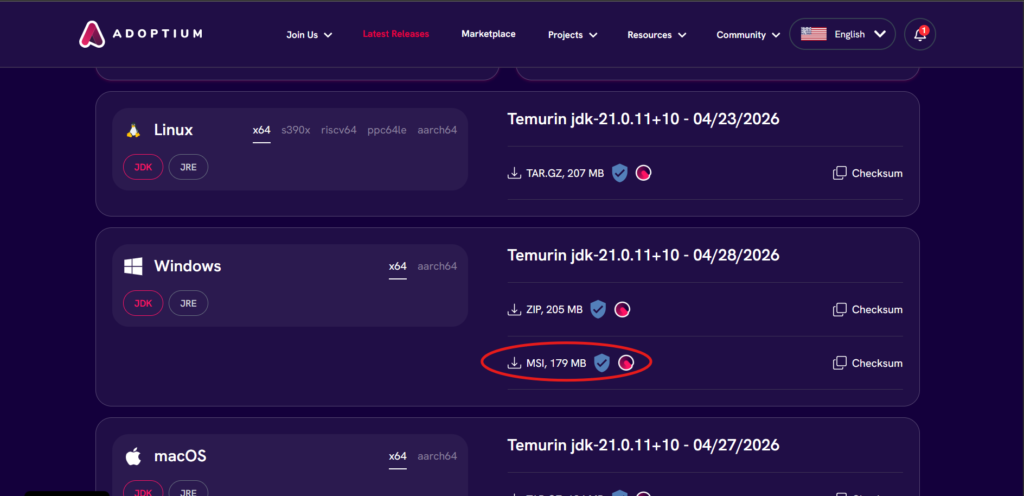
Both work identically for FP2. The Oracle version is fine for educational use.
Step 2 — Install the JDK
Run the downloaded .exe file. The installer is straightforward:
- Click Next on the welcome screen
- Leave the installation path as default:
C:\Program Files\Java\jdk-21 - Click Next → installation runs automatically
- Click Close when done
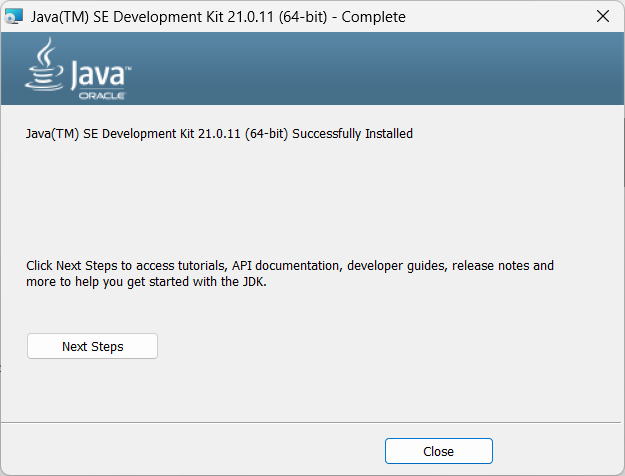
The default path is important — other tools expect to find Java there.
Step 3 — Verify the installation
Open Command Prompt (Win + R → type cmd → Enter) and run:
java --version
You should see:
java 21.x.x 20xx-xx-xx LTS
Java(TM) SE Runtime Environment (build 21.x.x+xx-LTS)
Java HotSpot(TM) 64-Bit Server VM (build 21.x.x+xx-LTS, mixed mode)
Then verify the compiler:
javac --version
javac 21.x.x
If you see these outputs, Java is installed and working. If you get “command not found” or “not recognized”, the PATH variable wasn’t set automatically — see the troubleshooting section at the end.
Step 4 — Install VS Code
If you already have VS Code from the Python setup guide, skip to Step 5. If not:
Go to https://code.visualstudio.com/ and download the Windows installer. Run it with these options checked:
- Add to PATH
- Register Code as an editor for supported file types
- Add “Open with Code” to Windows Explorer context menu
Step 5 — Install the Java extension pack for VS Code
Open VS Code. Press Ctrl + Shift + X to open the Extensions panel. Search for:
Extension Pack for Java
The publisher is Microsoft. Click Install. This installs 6 extensions at once:
- Language Support for Java — syntax highlighting, code completion, error detection
- Debugger for Java — run and debug programs with breakpoints
- Test Runner for Java — run JUnit tests (used in FP2)
- Maven for Java — build tool integration
- Project Manager for Java — project organisation
- IntelliJ IDEA Keymaps — optional, keyboard shortcuts
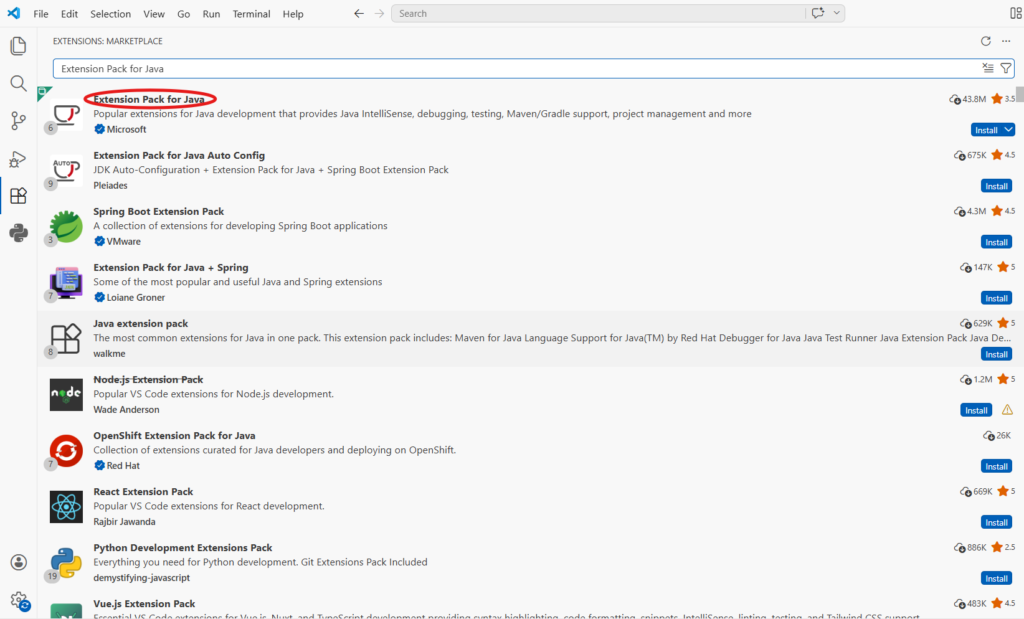
The essential ones for FP2 are the first two. The others are useful but not required immediately.
Step 6 — Write and run your first Java program
Create a folder for your Java work — for example C:\Users\YourName\Documents\FP2\Java.
Open VS Code, then open that folder: File → Open Folder.
Create a new file called HelloWorld.java:
public class HelloWorld {
    public static void main(String[] args) {
        System.out.println("Hello from Java!");
        System.out.println("JDK 21 is working correctly.");
    }
}
Important: the filename must match the class name exactly, including capitalisation. HelloWorld.java for class HelloWorld. If they don’t match, Java refuses to compile.
Run the program two ways:
Option 1 — VS Code Run button: A small ▶ play button appears above the main method. Click it → VS Code compiles and runs automatically. You see the output in the Terminal panel at the bottom.
Option 2 — Terminal: Open a terminal in VS Code (Ctrl + `` “) or Command Prompt, navigate to your file’s folder and run:
javac HelloWorld.java
java HelloWorld
javac HelloWorld.java compiles the source file and creates HelloWorld.class (the bytecode). java HelloWorld runs the bytecode on the JVM.
Output:
Hello from Java!
JDK 21 is working correctly.
Understanding the basic structure
Every Java program you write in FP2 follows this skeleton:
public class ClassName {
    public static void main(String[] args) {
        // your code here
    }
}
public class ClassName — every Java file contains one public class. The name must match the filename.
public static void main(String[] args) — the entry point. Java always starts execution here. This exact signature is mandatory — Java won’t run the program if main is missing or has the wrong signature.
System.out.println() — prints a line to the console, equivalent to Python’s print(). System.out.print() (without ln) prints without a newline at the end.
Troubleshooting — “java is not recognized”
If java --version gives an error after installation, the PATH variable wasn’t set correctly. Fix it manually:
- Search “environment variables” in Windows search
- Click “Edit the system environment variables”
- Click “Environment Variables”
- Under “System variables”, find
Pathand click Edit - Click New and add:
C:\Program Files\Java\jdk-21\bin - Click OK on all windows
- Close and reopen Command Prompt
- Run
java --versionagain
If you still get an error, check that the JDK is actually at C:\Program Files\Java\jdk-21 — the folder name might differ slightly depending on the exact version installed.
Quick summary
WHAT TO INSTALL:
  JDK 21 — from oracle.com/java/technologies/downloads
  VS Code — from code.visualstudio.com
  Extension Pack for Java — from VS Code marketplace

VERIFY IN CMD:
  java --version   → shows JDK version
  javac --version  → shows compiler version

FIRST PROGRAM:
  File: HelloWorld.java  ← must match class name
  Compile: javac HelloWorld.java  → creates HelloWorld.class
  Run:     java HelloWorld        → executes the program

BASIC STRUCTURE:
  public class ClassName {
      public static void main(String[] args) {
          System.out.println("Hello!");
      }
  }

JDK vs JRE:
  JDK = compiler + runtime → for development (what you need)
  JRE = runtime only → for running, not creating

COMMON ERRORS:
  "java not recognized" → PATH not set → add C:\...\jdk-21\bin
  "class not found"     → filename ≠ class name
  "cannot find symbol"  → missing semicolon or typo
In the next article we start Java programming from scratch — variables, types and the first real differences from Python.